#!html

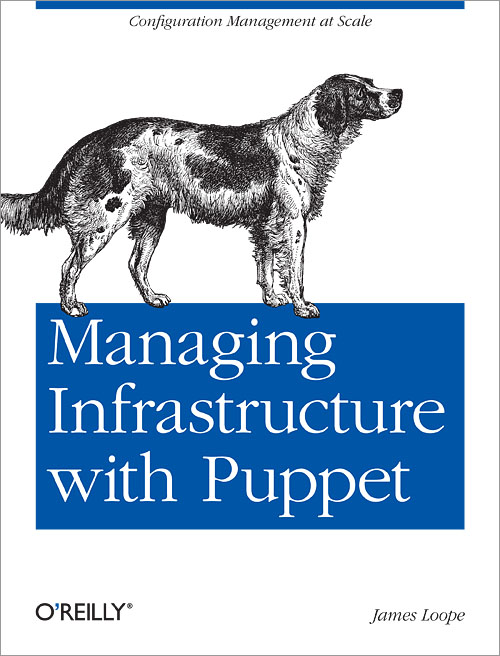
@kdmsnr さん の tweet で、Managing Infrastructure with Puppet と Pro Puppet が発売されている事を知ったので読んでみた。まずは Managing Infrastructure with Puppet について。
この本はとても薄い。全体で40ページ強くらい。なので、Puppet をまったく知らない人には全体像を知るためには良い本だけど、既に知っている人には物足りないと思う。
とは言っても、自分は最近の Puppet の動向を追えてないので、その辺の知識不足を補ってくれるような内容もあって、そこは良かった。
また、MCollective についても書かれていて、元々は Puppet Labs とは別なところで開発されていたツールなんで、Puppet とは完全に独立したツールだと思ってたんだけど、Puppet Labs 配下になってから統合が進められたようで、その辺の情報が得られたのがよかった。
以下、内容で気になったところなんかのメモ。
0.25 の次は 2.6 という風にバージョン体系が変わり、それまで puppetmasterd や puppetd といった形で独立していたコマンドが puppet コマンドに統一された、ってことは ペパボのイケメンインフラエンジニアの tnmt くん が既にブログに書いてある んだけど、それに伴い、コマンドオプションも増えて、やれることが増えてる模様。その中で特に気になったオプションを紹介。
リソースタイプのリストを表示してくれたり、指定したリソースタイプに関する説明を表示してくれる。
リソースタイプのリスト
$ puppet describe --list
These are the types known to puppet:
augeas          - Apply the changes (single or array of changes ...
computer        - Computer object management using DirectorySer ...
cron            - Installs and manages cron jobs
exec            - Executes external commands
file            - Manages local files, including setting owners ...
filebucket      - A repository for backing up files
group           - Manage groups
host            - Installs and manages host entries
k5login         - Manage the `
...
package リソースタイプの説明
$ puppet describe package

package
=======
Manage packages.  There is a basic dichotomy in package
support right now:  Some package types (e.g., yum and apt) can
retrieve their own package files, while others (e.g., rpm and sun) cannot.
For those package formats that cannot retrieve
their own files, you can use the `source` parameter to point to
the correct file.

Puppet will automatically guess the packaging format that you are
using based on the platform you are on, but you can override it
using the `provider` parameter; each provider defines what it
requires in order to function, and you must meet those requirements
to use a given provider.
Autorequires: If Puppet is managing the files specified as a package's
adminfile, responsefile, or source, the package resource will
autorequire
those files.
Parameters
----------

- **adminfile**
    A file containing package defaults for installing packages.
    This is currently only used on Solaris.  The value will be
    validated according to system rules, which in the case of
    Solaris means that it should either be a fully qualified path
    or it should be in `/var/sadm/install/admin`.

...
詳しくは puppet describe --help を参照。
コマンドを実行してるマシンの指定されたリソースの状態を、Puppet マニフェストで表示してくれる。
host リソースの表示
/etc/hosts の内容を Puppet マニフェストで表示。
$ puppet resource host
host { 'localhost.localdomain':
  ensure       => 'present',
  host_aliases => ['localhost'],
  ip           => '127.0.0.1',
  target       => '/etc/hosts',
}
host { 'localhost6.localdomain6':
  ensure       => 'present',
  host_aliases => ['localhost6'],
  ip           => '::1',
  target       => '/etc/hosts',
}
service リソースの表示
サービスの状態を Puppet マニフェストで表示。
$ puppet resource service
service { 'NetworkManager':
  ensure => 'stopped',
  enable => 'false',
}
service { 'acpid':
  ensure => 'stopped',
  enable => 'true',
}
service { 'anacron':
  ensure => 'stopped',
  enable => 'true',
}
service { 'atd':
  ensure => 'running',
  enable => 'true',
}
service { 'autofs':
  ensure => 'stopped',
  enable => 'true',
}

...
既に環境構築されたマシンから Puppet マニフェストの雛形を生成する、とかいった目的に使えそう。
Puppet マニフェストを即座に適用できる。
test.pp 内のマニフェストを適用する
$ puppet apply test.pp
直接マニフェストを文字列で指定するが --noop つけてるので実際には何もしない
$ puppet apply --noop -e 'file { "/etc/passwd": mode => 600 }'
notice: /Stage[main]//File[/etc/passwd]/mode: current_value 644, should be 600 (noop)
notice: Finished catalog run in 0.05 seconds
ちょっとした動作確認なんかするのに便利そう。
define でリソース定義して、呼び出すときにパラメータを渡す、なんてことは以前からできてたけど、2.6 からは Class にパラメータを渡すことができるようになったらしい。
クラス定義はこんな感じ。
class ruby ( $version = '1.8.7') {
    package { 'ruby': ensure => $version }
}
Parameterized Classes ではない、従来のクラスの呼び出し方。これだと、Ruby 1.8.7 がインストールされる。
node 'test.example.jp' {
    include ruby
}
パラメータを渡してやると、Ruby 1.9.2 がインストールされる。
node 'test.example.jp' {
    class { 'ruby': version => '1.9.2' }
}
便利そうだけど、従来の include とだいぶ書式が変わるので、混乱しそう。
Puppet モジュールを集めた Puppet Forge なんてサイトができてたんだね。Puppet 版 CPAN といった感じ。puppet-module-tool というコマンドラインツールを使って、モジュールのインストールとかパッケージングとか色々できるようなんだけど、この本には詳しい説明がなかった。Pro Puppet には詳しい説明があったので、Pro Puppet についての感想を書くときに、この辺について少し詳しく書くつもり。
MCollective は、複数のホストに対して同じ処理を並列実行するためのもの。Func とか Fabric とか Capistrano みたいな位置づけ。
こんな感じで実行できる。(apache2 を再起動する例。)
$ mc-service --with-class apache2 apache2 restart
$ mc-service --with-class apache2 --with-fact architecture=x86_64 apache2 restart
Puppet の特定のクラスを include してるホストでのみ実行とか、特定の fact (facter によって得られる値) にマッチするホストでのみ実行、という感じで Puppet と連動できる。
Puppetd Agent というプラグインもあって、これを使うと、各ホストの puppet agent の操作を MCollective 経由でできる。つまり、puppet kick(古いバージョンだと puppetrun)の代わりに使える。これの何がうれしいのかというと、puppetrun では特定のクラスを include したホストだけを対象にする、ということをやろうと思うと、LDAP Nodes が必須だった(2.6 でもそうなのかは知らん)けど、このプラグインだとそれが不要になりそう、ってあたりかな。
あと、Puppet Commander というプラグインを使うと、puppet agent の同時起動数を制御できて、puppet master へ同時アクセスが集中しないようにコントロールできるらしい。大量にホストがある環境では良さそうですね。
それから、MCollective プラグインを書くためのドキュメントへのリンク も載ってた。が本では詳しい説明はなし。
というわけで、Managing Infrastructure with Puppet について気になった点は以上。次は Pro Puppet について、気が向いたら書きます。